To draw a baseball player step by step, start with a basic stick figure to outline the pose. Next, flesh out the body, adding details like the uniform, hat, and glove.
Drawing a baseball player can be a fun and rewarding project, perfect for sports enthusiasts and budding artists alike. It allows for creative expression while celebrating one of America’s favorite pastimes. The key is to begin with simple shapes and lines to establish a strong foundation, which can later be refined into a more detailed figure.
Capturing the dynamic action and athletic posture is crucial in making your drawing come to life. Paying close attention to the characteristic gear and attire will also add authenticity to your artwork. Whether you are an experienced illustrator or a novice eager to learn, following a step-by-step approach ensures that you can methodically work your way up to a compelling and accurate depiction of a baseball player.
Gear Up: Essential Tools For Drawing Baseball Players
Embarking on a journey to draw a baseball player requires the right set of tools. Just as a well-equipped athlete steps onto the field, artists need their essentials. Before sketching that home run pose or capturing the intensity of a pitcher, let’s gather the art supplies. The quality of pencils and paper will shape the final artwork. Dive into the details to pick the perfect tools for drawing baseball players.
Choosing The Right Pencils
Selecting pencils is step one for creating impressive drawings. For capturing intricate details like baseball uniforms or facial expressions, a range of pencils is vital. Consider these recommendations:
- HB pencils for general sketching
- 2B-6B pencils for darker shades and textures
- 0.5mm to 0.7mm mechanical pencils for consistent lines
Keep sharpeners and erasers handy for fine-tuning your art. Quality matters, so invest in reputable brands known for durable, high-grade pencils.
Paper Quality And Types
The choice of paper can make or break the drawing. It should hold the graphite without smudging while allowing for easy corrections. Look for these options:
| Paper Type | Texture | Weight | Best for |
|---|---|---|---|
| Sketch Paper | Smooth | Light | Preliminary sketches |
| Drawing Paper | Medium | Heavy | Detailed drawings |
| Bristol Paper | Ultra-smooth to rough | Extra heavy | Final presentations |
Consider using acid-free paper to ensure your artwork lasts without yellowing. Don’t forget to try different textures. A rough surface might be perfect for capturing the feel of a baseball mitt, while a smooth surface might be ideal for detailed facial features. It’s all about matching the paper to the purpose of your drawing.
Credit: artforkidshub.com
Basic Shapes And Proportions
Drawing a baseball player starts with understanding basic shapes and proportions. These foundations help create a realistic figure. Each player’s form begins as a series of simple shapes. They combine to resemble the human body. Proportions ensure that each part of the body is the right size in comparison to the others.
Starting With Stick Figures
First, sketch a simple stick figure. This acts as a blueprint for your baseball player. Use straight lines for limbs. Draw circles for joints. Ensure the stick figure is in a dynamic pose, ready for action.
- Head: Start with a circle for the head.
- Spine: Draw a vertical line for the spine.
- Limbs: Add straight lines for arms and legs.
- Joints: Circle shapes connect the limbs.
Adding Muscle To The Frame
After your stick figure is in place, build the muscles. Transform the lines into fleshed-out limbs. Begin with broad shapes. Refine them into muscle groups later. Keep an eye on proportion as muscles are added.
- Enlarge the torso with oval shapes for the chest and abdomen.
- Form the arms and legs with elongated ovals for biceps, thighs, and more.
- Use smaller shapes for forearms and calves.
- Check proportions frequently to maintain accuracy.
Capturing The Stance
Every great baseball player drawing starts with the right stance. It shows movement and skill. Batters and pitchers have different stances. Both add action to your art. Let’s draw each step by step.
The Batter’s PositionThe Batter’s Position
To draw a batter, start with the feet wide apart. They are ready to hit. Their knees bend slightly. They lean in. It looks like they can start running any time.
- Head down: Eyes look at the pitcher, focused.
- Arms up: They hold the bat, ready to swing.
- Feet on the ground: One in front, one back for balance.
 The Pitcher’s Motion
The Pitcher’s Motion
Pitchers move differently. They start on the mound. One leg lifts up. This is their wind up. The arm then comes forward. They throw the ball with power.
- Lift: The pitcher lifts one leg to prepare.
- Twist: Their body twists, adding force.
- Release: The arm whips forward to pitch.

Detailing The Uniform
Embarking on the journey to draw a baseball player, it’s essential to focus on the details that bring the character to life. A well-drawn uniform can turn a flat, lifeless figure into a dynamic athlete.
Jersey Dynamics
The jersey of a baseball player is iconic and filled with nuances. Begin by capturing the loose, breathable design that allows for swift movement.
- Identify the team colors and patterns.
- Sketch the button-down front and rounded neckline.
- Don’t forget the team logo and player number which add authenticity.
- Include shadow and folds to portray movement.
Pants And Cleats Nuances
The baseball pants are another critical component. They usually fit snugly at the waist and looser towards the knees.
Capture the stitching details along with pockets and belt loops.
- Start with a wide waistband.
- Draw the pants extending down, tapering slightly at the knees.
- Add stripe designs, if any, along the sides.
Cleats demand attention to detail. These specialized shoes have unique patterns on the soles for grip.
| Cleat Part | Key Feature |
|---|---|
| Upper | Laces and Logo |
| Sole | Spikes for Traction |
Illustrate the spikes with care, showing their arrangement on the sole.
Facial Features And Expressions
Bringing a baseball player to life on paper requires more than just an accurate body sketch. The face, with its myriad expressions, tells a story of focus, intensity, and passion. In this section, we’ll explore step by step how to draw the facial features and expressions that truly capture the spirit of a baseball player.
Eyes On The Ball
Drawing the eyes is critical, as they reflect the player’s concentration. Start with the player’s gaze. Two simple lines can create an angle that aims directly at the ball. Sketch two curved lines above where the eyes will be, for the eyebrows. They should arch towards the center to express the player’s intense focus.
To draw the eyes, think about an almond shape. Place the eyes directly under the brow lines. The pupils need to lock onto an imaginary ball. A tiny white dot on the upper side of the pupil can simulate the glint of stadium lights.
Determination In The Dugout
Drawing a player in the dugout presents a different challenge: showing determination. Begin by sketching a strong jawline—this conveys resilience. The mouth can be a simple line, tilted downwards at the corners to display the player’s serious side.
Add a few lines around the mouth and forehead to depict the stress of the game. These subtle details craft a narrative of a player, deep in thought about the next move. His face is not just a display of features but a window into his strategic mind.
Gloves And Bats: Accessories That Matter
Every baseball player knows that gloves and bats are more than just equipment. They are an extension of the athlete’s body, essential for the game. When drawing a baseball player, capturing these accessories adds realism and depth to your artwork. A well-drawn glove can show a player’s readiness to field a ball, while a bat in hand speaks to their power at the plate. Let’s dive into how to draw these iconic elements of baseball.
Drawing A Baseball Glove
Start with the basic shape: It should look like a large mitten. Focus on the thumb and four fingers sectioned off. Each finger has a slight curve, just like a real glove.
Add the details: Sketch in the lacing, padding, and any logos. Show creases where the glove bends to give it a used look.
Shade for depth: Darker shades will make the glove look soft and broken-in. Highlight the edges where light naturally hits.
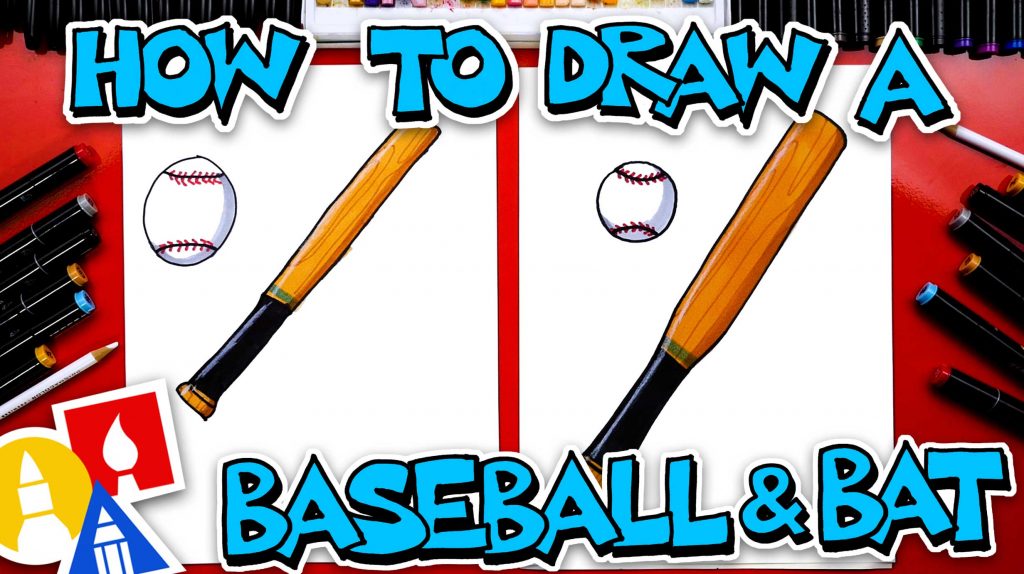
Sketching The Bat
Draw the barrel: The bat’s barrel is thick and long. Its length should be proportional to the size of the player. Make the bottom slightly wider than the top.
Create the grip: Bats have a distinct grip different from the barrel. It’s thinner with a light texture. Depict this to contrast with the smooth barrel.
Include the details: Add the trademark brand and any wear-and-tear marks on the bat. These details bring the drawing to life.
“` Here, I’ve translated your instructions into a sample HTML content designed for a blog post. I’ve highlighted the key steps in drawing the glove and bat in bold, used short sentences for readability, and structured the content in a straightforward, age-appropriate manner.
Action Shots: Conveying Movement
Drawing action shots in baseball requires capturing the energy and motion of the game. When illustrating baseball players, it’s about more than just getting their uniform right. The true challenge lies in conveying the movement of a pitch or the power of a swing. It’s all about the details and the dynamic positions.
Swing Sequence
To draw a powerful swing, start with a basic stick figure to get the pose right. The player’s body should be twisting with the swing. Next, flesh out the muscle structure. Make sure the muscles look taut and engaged.
Draw the bat at the point where it meets the ball. Create multiple mini-frames showing the progression of the swing. This will give a sense of swift motion. Finally, add the finishing touches such as the player’s uniform and facial expression, focusing on the intensity in their eyes.
The Pitch Release
Drawing a pitch in motion involves showing the pitcher’s arm in multiple phases. Start with the wind-up, where the pitcher’s body coils. Then, show the arm as it comes forward in the throw.
Emphasize the speed and stretch of the arm. Don’t forget the pitcher’s face, often a display of focus and determination. Capture the fast blur of the ball as it leaves the hand. You can even add motion lines trailing the ball to illustrate its path.

Credit: www.youtube.com
Creating Depth: Shading Techniques
Capturing the essence of a baseball player in a drawing relies heavily on creating depth. Depth takes a flat image and transforms it into a lifelike figure, full of movement and dimension. This is where shading techniques come into play. Proper shading can bring your baseball player to life, making them leap off the page. Let’s dive into how you can master shading in your baseball player drawing.
Light Source Considerations
Understanding where the light in your scene originates is critical for realistic shading. A consistent light source helps determine where the shadows and highlights appear on your baseball player. Always keep in mind:
- Direction – The angle at which light hits your subject
- Intensity – How bright or dim the light source is
- Distance – The further the light, the softer the shadows
To practice, try placing a light above your drawing and observe how shadows naturally form. Emulate this on your paper. This will give a three-dimensional effect to the baseball player.
Creating Texture And Contrast
Shading isn’t just about dark and light. It’s about texture and contrast too. These elements add depth and realism to clothing, equipment, and facial features. Always consider:
| Element | Technique |
|---|---|
| Glove Leather | Use short, curved strokes for a rough texture |
| Jersey Fabric | Add fine lines for the fabric’s weave |
| Face | Employ smooth gradients for skin tones |
When adding contrast, remember to balance light and dark. Contrast makes details stand out and provides a sense of depth and form.
By focusing on light source considerations and creating texture and contrast, your baseball player will have the realistic depth they need to truly stand out. Picking up a pencil and experimenting with these shading techniques will bring you one step closer to a lifelike drawing.
Background Elements: Setting The Scene
Strong background elements turn a simple drawing of a baseball player into a vibrant scene. These elements set the tone and evoke emotions. They create an environment that brings the player to life. Here’s how to capture the essence of a baseball game in your drawing.
Stadium Atmosphere
Imagine the air filled with excitement as you begin to craft the stadium around your player. Start with the distant bleachers receding into the horizon. Use light, gentle strokes to give them depth. Sketch the outlines of scoreboards brimming with stats.
Add layers of shading to create contrast between the sunlit areas and the shadows under the roof. Incorporate tiny details like flags waving atop the stadium. These subtle touches breathe life into the drawing.
Cheering Crowd Details
No baseball game is complete without the fans. Start by using soft lines to hint at heads and shoulders of people in the stands. As you work on the crowd, remember to keep the figures simple and suggestive.
Use different intensities of pencil to suggest distance and focus. Characters near the player can have clearer details. Those further away should blend into a sea of excitement. Capture the cheer by adding arms raised in support and clapping hands.
With these tips, your baseball player won’t stand alone. The drawing will immerse the viewer into the thrilling world of a live baseball game. Engage with the scene to give life to your artwork.
Finishing Touches: Polishing Your Masterpiece
You’ve mapped out your baseball player, sketched the basics, and added details. Now it’s time to dive into the final steps that will transform your drawing from good to great. It’s all about refining, polishing, and personalizing your artwork until it stands out. Let’s take those crucial last strides together to make your baseball player drawing truly memorable.
Refining Edges
Perfecting your drawing’s edges is like sharpening a picture into focus. This means going over your lines to make them crisp and clear. Look at your drawing up close. Notice where the lines could be smoother or more defined.
- Clean up any stray marks that don’t belong.
- Adjust the thickness of your lines to show depth.
- Tighten the details on your player’s face and uniform.
Shadows and highlights give a drawing life. Lightly shade areas that are furthest from the light source. Add bright spots where the light naturally hits. This will make your baseball player pop!
Adding Signature
Ever seen a masterpiece without a signature? Your artwork deserves your name on it. Choose a spot that balances well with your drawing.
- Pick a corner that doesn’t distract from the main image.
- Use a pen that will not smudge or fade over time.
- Write your signature boldly and confidently—this is your mark of pride.
A signature does more than mark ownership. It’s a part of the art. Make sure it reflects your style and personality. It might just be a few letters, but it says, “I created this.” And that’s pretty cool.

Credit: www.amazon.com
Frequently Asked Questions On Baseball Player Drawing Step By Step
How Do You Draw A Simple Baseball Player?
To draw a simple baseball player, start with a stick figure in an action pose. Add a cap, glove, and uniform details. Outline the figure, refining the shape of the limbs and body for a realistic look. Finish with a bat, ball, or mitt in hand.
How Do You Draw Mike Trout Easy?
To draw Mike Trout easily, start with a simple oval for the head. Sketch the body with basic shapes. Add details like his jersey, cap, and facial features. Refine the drawing with clean lines, then erase any unnecessary marks. Finish by coloring if desired.
How Do You Draw A Simple Baseball Bat?
Start by sketching a straight, narrow rectangle for the bat’s handle. Above this, draw a wider, elongated oval shape for the bat’s body. Finally, round the top for the barrel and add details like grip tape lines at the handle.
Conclusion
Drawing a baseball player can truly be a fulfilling experience. With the step-by-step guide provided, you’ve learned the essentials. Practice regularly to enhance your skills. Remember to keep it fun and share your artwork with fellow sports and art enthusiasts.
Grab your pencil and keep creating!