How to Fix Baseball Glove Laces: Step-by-Step Repair Guide
To fix baseball glove laces, rethread or replace the broken or loose laces with a lace tool. Match the lace material to ensure consistency and durability.
Baseball gloves are essential gear for players and maintaining them is crucial for performance and safety. Over time, the laces on a baseball glove can become worn or break, necessitating a fix to keep the glove in top shape. Properly fixing the laces not only restores the integrity of the glove but also extends its lifespan, ensuring you’re ready for the next game.
A baseball glove in perfect condition enhances your confidence on the field. It supports optimal control and catching ability. Whether you’re a seasoned pro or a weekend enthusiast, knowing how to repair your glove’s laces can save time and money while preserving the snug fit and feel you’ve grown accustomed to.
Introduction To Baseball Glove Maintenance
The key to a long-lasting baseball glove lies in consistent maintenance. Just as a car requires regular service to run smoothly, a baseball glove needs care to perform at its best on the field. Whether you’re a seasoned pro or a little league starter, understanding the basics of glove maintenance is essential. Let’s dive into the importance of glove care and how to address common lacing issues.
Importance Of Glove Care
Giving your glove the TLC it deserves can go a long way. Proper care:
- Extends the glove’s life
- Preserves the leather’s flexibility and strength
- Improves performance in the game
- Prevents deterioration and damage
By committing to regular maintenance, your glove stays game-ready season after season.
Lacing Issues: Common Problems
Over time, even the toughest glove laces can encounter issues:
| Lacing Issue | Symptom | Cause |
|---|---|---|
| BREAKAGE | Laces snap or tear | Aging, wear, and tear |
| LOOSENING | Glove feels floppy | Repeated use |
| STIFFNESS | Laces are hard to adjust | Lack of conditioning |
Kick-start your glove’s rehabilitation by diagnosing lacing ailments early.
Credit: www.diamondsportgear.com
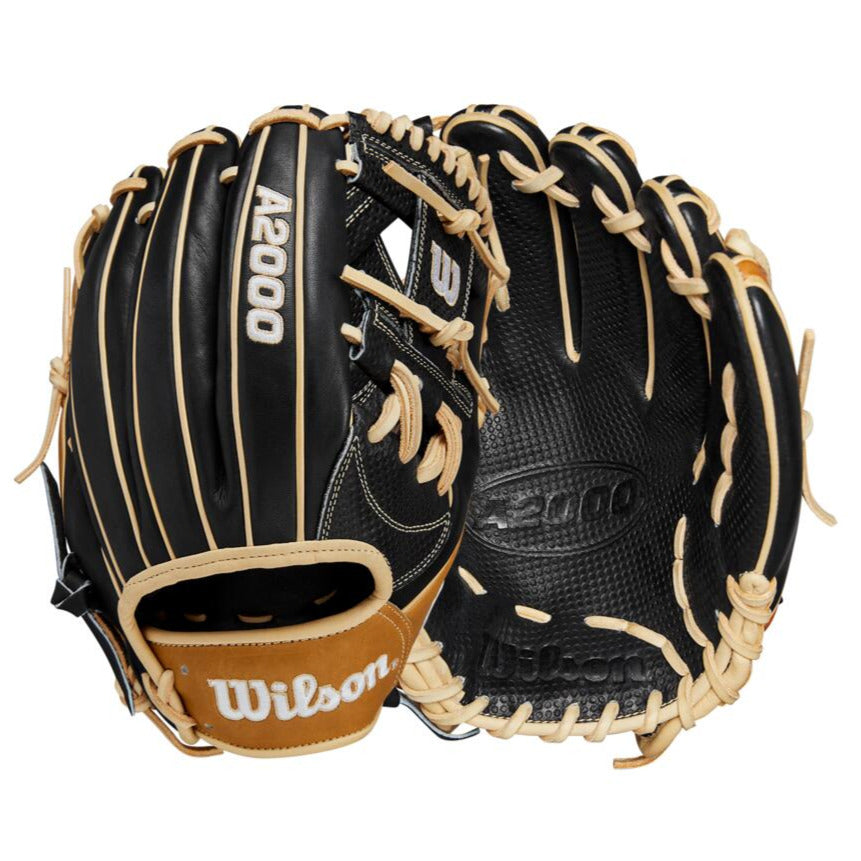
Essential Tools For Relacing
Essential Tools for Relacing are the foundation for restoring the feel and function of your treasured baseball glove. A proper relacing job can extend the life of your glove, ensuring it stays in the game for seasons to come. To start, you’ll need the right lace and a set of specific tools tailored for the task.
Selecting The Right Lace
Choosing the correct lace is vital for both the durability and performance of your glove. Follow these guidelines:
- Match the original lace color or select a color that complements your glove.
- Opt for genuine leather laces, which provide strength and flexibility.
- Ensure the lace thickness matches your glove’s existing laces.
- Pick laces that are long enough for your specific type of glove.
Necessary Tools For The Job
A relacing project requires precision tools. Gather these before you start:
| Tools | Description |
|---|---|
| Lacing Needle | An essential tool for threading the lace through the glove’s eyelets. |
| Lacing Awl | Used to widen or re-open holes that have shrunk or closed over time. |
| Cutting Pliers | Needed to snip old laces and trim new ones. |
| Glove Oil | Provides ease in lacing and helps soften the leather. |
With the right lace and essential tools in hand, you’re set to revive your glove’s craftsmanship.
Preparation Steps Before Starting
Before stepping up to repair the laces of your baseball glove, a bit of groundwork lays the foundation for a successful fix. Proper preparation ensures that the re-lacing process is smoother and helps maintain the glove’s longevity. Let’s dive into the required steps for a well-executed glove lace repair.
Cleaning The Glove
Start by giving your glove a thorough clean. Dirt and grime can cause friction. This friction may damage new laces. Use a soft brush to gently remove surface dirt. Next, apply a small amount of glove conditioner with a clean cloth. Work in circular motions to cover the entire glove. This not only cleans but keeps the leather supple. Let the glove dry naturally before proceeding.
Removing Old Laces
Once your glove is clean, focus on removing the worn-out laces. Begin by snipping the knots at either end of the laces with a pair of scissors. Pull the laces out slowly to avoid tearing the leather. If the laces feel stuck, gently wiggle them back and forth. This motion loosens them. Extract all pieces of old laces. Keep them as a reference for length when you thread in new ones.
Basic Lacing Techniques
Whether you’re stepping up to the plate or fielding ground balls, a well-laced glove is crucial. Baseball gloves are essential gear, but over time laces can fray or break. Knowing how to re-lace a glove is an invaluable skill. Let’s dive into the fundamental lacing techniques that will keep your mitt in game-ready shape.
The Standard Over-under Method
The most common lacing technique is the over-under method. It’s simple and effective:
- Thread the lace through the bottom hole from the inside out, ensuring equal lengths on both sides.
- Alternate weaving the laces over and under each adjacent loop across the glove fingers.
- Pull tightly after each pass to eliminate slack for a snug fit.
- Repeat this pattern until you reach the end of the lacing path.
Lock Stitch: Ensuring Durability
A lock stitch secures the laces and adds durability:
- Cross the laces at a perpendicular angle and thread under the adjoining lace.
- Loop each end of the lace through the created openings.
- Pull tight to lock the laces in place.
- Continue with the over-under pattern, adding lock stitches at key stress points around the web and pocket.
Tips For Threading Laces Through Holes
Fixing a baseball glove’s laces can be tricky. With the right tools and techniques, any player can thread laces easily. Strong and well-threaded laces ensure a snug fit and lasting durability. Follow these expert tips to master the threading process.
Making Use Of A Lacing Needle
- Start by selecting the right lacing needle. It should be durable and fit your lace size.
- Attach the lace firmly to the needle to prevent slipping during threading.
- Push the needle through the hole, pulling the lace all the way through.
Avoiding Twists And Tangles
- Keep the laces flat and untangled before threading.
- Pull slowly and steadily to avoid creating knots or twists.
- Use your fingers to guide the lace and maintain tension.
Working On The Fingers Section
The ‘Working on the Fingers Section’ of your baseball glove is crucial. It’s where catches are secured and plays are made. Proper lacing in this area ensures your glove performs at its best. Below are steps to make those fixes as smooth as slick fielding.
Order For Lacing The Fingers
To begin, understand the proper sequence to lace the fingers. This order matters. It prevents twists and ensures each lace correctly supports its corresponding finger stall.
- Start at the base of the pinky finger.
- Lace towards the index finger.
- Interlace between fingers from bottom to top.
- Finish at the top of the index finger.
Tightness And Flexibility
The right balance between tightness and flexibility is essential.
- Finger laces should be snug but not too tight. Over-tightening can limit your glove’s flexibility.
- Test finger movement after lacing. Adjust if needed. Your fingers should move easily, but the glove should hold its shape.
- Flexibility enhances performance, helping you adapt to different catches.
Securing The Thumb And Pinky
For baseball lovers, a well-maintained glove is crucial to game performance. Securing the thumb and pinky laces is particularly important. They’re under constant stress, affecting catch stability. Proper lace fixes boost glove integrity for crucial plays. Let’s dive into the precise methods to keep these areas game-ready.
Special Tips For The Thumb Lacing
Thumb lacing can loosen over time. Tight laces mean better control. Follow these steps for a firm thumb fix:
- Identify loose thumb laces.
- Gently pull each lace segment, working toward the end loop.
- Use a lace puller for tighter pulls.
- Finish with a secure knot, hidden in the thumb slot.
Use waxed laces for longevity. They withstand wear and tension well.
Dealing With The Pinky Loop
Pinky loops provide essential glove shape. Repairing them can feel tricky. The following tips ensure a well-rounded repair:
- Start at the finger’s base, tighten each lace segment one at a time.
- When reaching the loop, make sure it’s comfortably snug.
- Replace frayed laces to prevent mid-game breaks.
For an even fix, apply consistent pressure while pulling each section.

Credit: www.diamondsportgear.com
The Webbing Mystery Solved
Baseball glove laces are the unsung heroes that keep your mitt in game-ready shape. Over time, they can wear out or break, leaving many players puzzled. Fear not! The mystery of fixing baseball glove webbing is not as daunting as it seems. This section will guide you through the process. You’ll strengthen your glove’s net and learn about the different styles of webbing available.
Different Webbing Styles
Glove webbing comes in various styles, each offering its own benefits. Here’s a breakdown of the most common types:
- I-Web: Offers flexibility and visibility for infielders.
- H-Web: Typically used by outfielders for better ball snagging.
- Single Post: Provides a sturdy option for first basemen.
- Trapeze: Allows for a deeper pocket and range for any position.
Strengthening The Catching Net
A strong net is essential for a reliable catch. Follow these steps to ensure your glove’s webbing is at peak performance:
- Inspect the laces: Look for frayed or stretched laces.
- Choose quality laces: Invest in high-grade leather laces.
- Remove old laces: Carefully take out the damaged laces using a lace tool.
- Weave new laces: Thread the laces following the original pattern.
- Tighten securely: Make sure the laces are tight and even.
Don’t forget to condition your laces and glove regularly. This helps prevent future damage and maintains the glove’s integrity.
Final Adjustments For Comfort And Fit
After re-lacing your baseball glove, making sure it fits like a second skin is crucial. Comfort and fit are the final steps to get back in the game confidently. Let’s dive into customizing your glove’s fit and discuss break-in techniques.
Customizing The Fit
To ensure your glove is tailored to your hand, follow these simple yet effective steps:
- Tighten the laces in each section to your liking.
- Adjust the finger stalls by gently pulling the laces.
- Flex the glove to create natural creases for flexibility.
Wearing the glove while adjusting laces allows you to feel the fit and make changes on the fly. Keep in mind, it should feel secure but not too tight.
Break-in Techniques Post Lacing
Once you’ve laced your glove, the break-in process begins anew. Here’s a highlight of effective methods:
- Play catch regularly to form the pocket.
- Use a conditioning oil to soften the leather.
- Keep the glove wrapped with a ball in the pocket when not in use.
Remember, applying gentle pressure and maintaining routine maintenance will keep your glove game-ready. Allow time for the leather to adapt to your hand’s unique shape for the perfect fit.
Maintaining Your Newly Laced Glove
After re-lacing a baseball glove, proper care keeps it in great shape. These steps ensure the glove remains ready for the next big game.
Regular Cleaning And Conditioning
Maintaining your newly laced glove begins with regular cleaning and conditioning. Dirt and sweat can break down the laces and leather over time.
- Wipe down the glove with a damp cloth after each use.
- Use a soft brush to remove embedded dirt.
- Apply leather conditioner to keep the leather soft and pliable.
- Let the glove air dry away from direct heat to prevent cracking.
When To Relace Again
Knowing when to relace your baseball glove is key to its longevity. Look out for these signs:
| Sign | Action |
|---|---|
| Laces feel loose | Adjust or tighten them |
| Laces are fraying | Plan to relace soon |
| Laces break | Relace immediately |

Credit: www.diamondsportgear.com
Frequently Asked Questions On How To Fix Baseball Glove Laces
Can A Baseball Glove Be Restrung?
Yes, a baseball glove can be restrung. Many sporting goods stores offer restringing services for worn or broken laces.
How Hard Is It To Relace A Glove?
Relacing a glove can be moderately difficult, depending on the glove’s complexity and your DIY skills. It typically requires patience, a lacing needle, and quality leather laces.
How Do You Soften Baseball Glove Laces?
To soften baseball glove laces, apply a leather conditioner. Work it gently into each lace. Let it absorb and dry to maintain flexibility. Avoid over-softening to preserve the glove’s integrity.
Conclusion
Restoring your baseball glove’s laces can extend the life and improve the performance of your trusty mitt. With the simple steps covered, you’re now ready to tackle any lace-related issues. Remember, regular maintenance keeps your glove in game-ready shape. Now, grab your tools and give your glove the care it deserves!